 A Change Log within computerized maintenance management system (CMMS) software is an essential concept for maintenance professionals, with practical implications.
Also known as the Audit Trail, the Change Log is a step-by-step record that allows the user to trace data to its source. Having this kind of chronological history creates documentary evidence of the entire sequence of activities affecting a specific asset, operation, procedure, or event.
The Change Log within eMaint CMMS software can play a significant role when audits are performed, especially since regulations in several industries require strict principles and procedures for storing and tracking electronic data for audit purposes. For example, the pharmaceutical industry must abide by the Good Automated Manufacturing Practice (GAMP) guidelines. Similarly, the U.S. Food and Drug Administration (FDA) must adhere to Title 21 CFR Part 11 regulations on electronic records being considered trustworthy and reliable.
eMaint’s Change Log table is a unique function that can be configured in your account and enable you to see the logged changes made on a form or table. Specifically, the Change Log documents the changes made, the old and new values, the date and time the changes were made, and the user making the change. While this configuration is usually applied to the Work Orders table, it can also be leveraged for other tables you may select.
Need help implementing the Change Log in your account? See who to contact at the end of this article.
Adding the Change Log to your related tables
Once you have the Change Log, you can view its information in a “related table” to the main table where it was added. In other words, if you add the Change Log to the Work Order table, it becomes a related table to the Work Orders table. Similarly, if added to the Assets table, it would become a related table to your Assets.
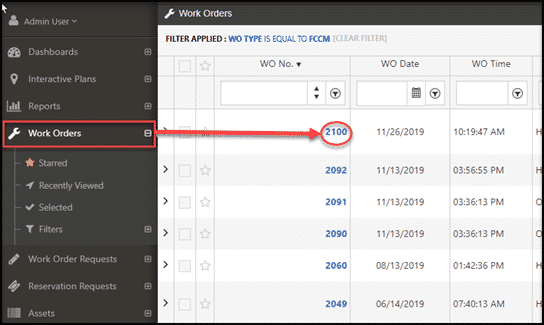
If the Change Log is not displayed as part of your related tables, you will need to add it. To do this, navigate to your main table, which in the example below is Work Orders. Click on Work Orders on the main menu and go into the Record Detail of a work order.
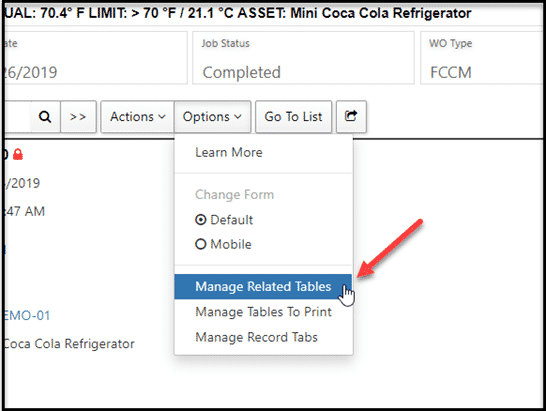
Hover over the Option tab and select “Manage Related Tables.”
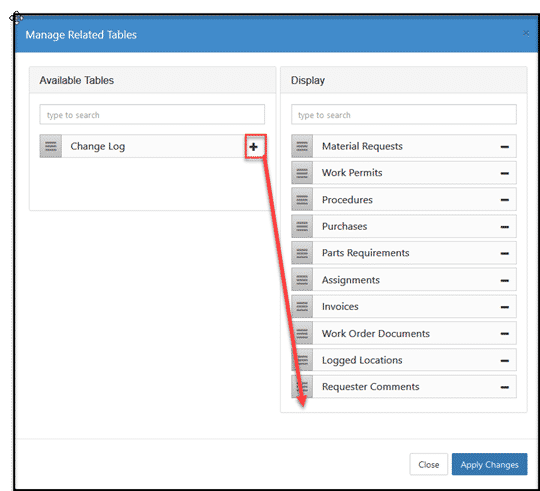
There you will see the related table called “Change Log” on the left-hand side of “Available Tables.” Click the “plus” button to add the Change Log to the bottom of the “Display” list on the right-hand side. The order of the tables is not significant at this time.
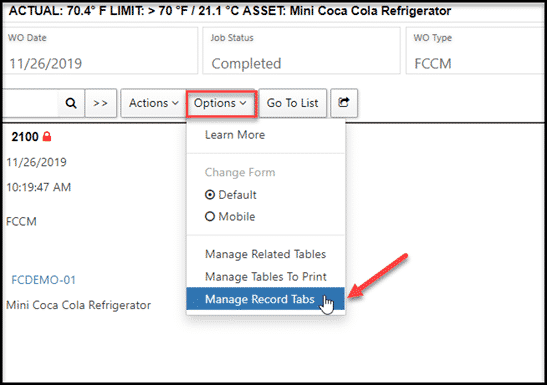
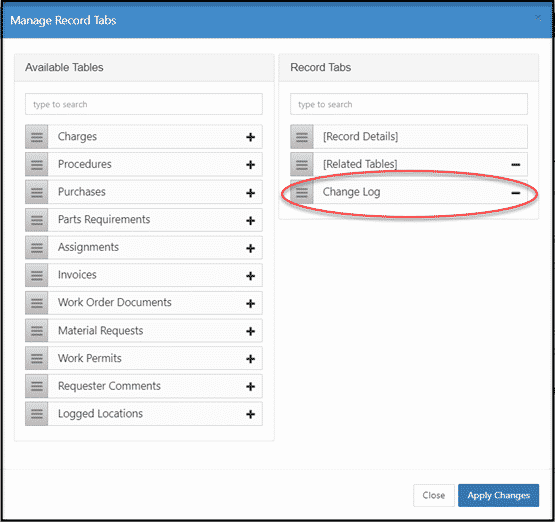
If you want the Change Log to have its own tab within your record, instead of being displayed with all related tables, go back and hover over the Options drop-down again and select “Manage Record Tabs.” This tab will determine where your Change Log-related table will appear in relation to your other tabs and related tables for work orders.
In the example below, we moved the “Change Log” from the “Available Tables” side to the “Record Tabs” side so that it became its own tab, along with Record Details and Related Tables.
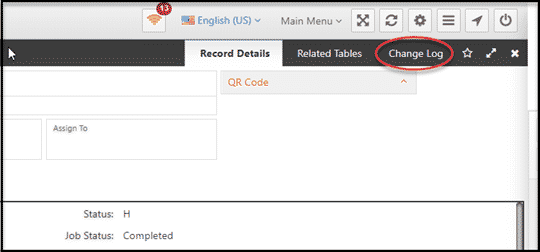
After doing so, you will notice the “Change Log” tab at the top of the record.
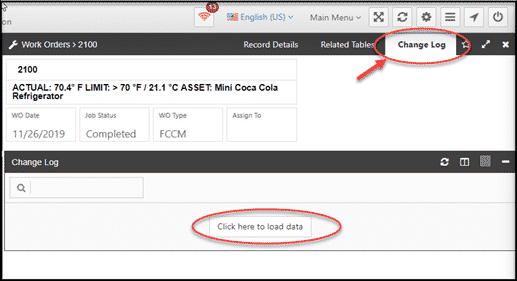
Once in the Change Log, you can load the data and see all the changes made to that record.
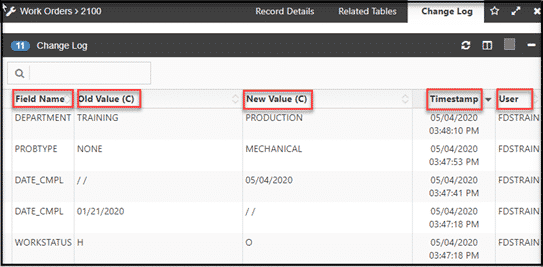
You will also be able to see the name of the field changed, the old value in that field, the new value in the field, the date and time the change was made, and the user’s name who made the change.
To discuss the details of implementing the Change Log in your account, please contact your eMaint Customer Success Manager at (239) 241-1362 ext. 2 or email [email protected].
